|
The Art of Demomaking - Issue 04 - Per Pixel Control by (13 September 1999) |
Return to The Archives |
Introduction
 |
|
For those of you that read the tutorial last week, welcome back... As for the others, if you want to complete this tutorial properly, go and read last week's now! This week, I will explain per pixel control, the way most 2D effects work. You will also learn the basics behind the sine function, and we will code a simple plasma effect. |
|
Full Screen Effects
|
In week one, for our starfield effect, we only needed to draw the pixels where the stars were. The case where only a few pixels are drawn is quite rare. Indeed with most effects, the entire screen is drawn. To do this we must avoid using put-pixels for each separate pixel, since this would be quite slow. Instead, we use a "for" loop:
Notice that all the pixels are drawn, so we don't need to clear it beforehand. We did this in the cross fader, but last week's tutorial would have been to heavy if I had explained it then :) |
|
Per-Pixel Control
|
|
The pseudo-code above is the generic form of an effect with per-pixel control. This essentially means that we can set any pixel to any value we want. And this is where artistic skills and mathematics meet. The trick is to be able to think of a cool effect, to describe it in a mathematical form, and then somehow manage to render that in real time. And believe me, most of the time you have to settle for an effect that's about a quarter as cool as you imagined :) Another way to create effects is to combine existing effects together, but that's understandably not as original, but still impressive. One major disadvantage of hardware acceleration is precisely that per pixel control is made very tedious. But more on that topic later, since I will probably be irresistibly drawn into the heated debate between software and hardware rendering. |
|
The Plasma Function
|
| A plasma is defined by a function, usually composed of sines, which evolves over time. So every frame, we define a function that takes a 2D point as a parameter, and that returns a real number. We calculate that result for each pixels, and apply a colour. That's all there is to it :) But I'll brake that explanation down into smaller chunks, to make it easier for you to digest... |
|
The Sine Function
|
I won't go into much detail, firstly because it might get you confused, and secondly because HTML isn't ideal to represent mathematical formulae (fair enough that's not a good excuse, but it makes me wonder about the efficiency of Office 2000 :) Anyway, the sine function looks like this. 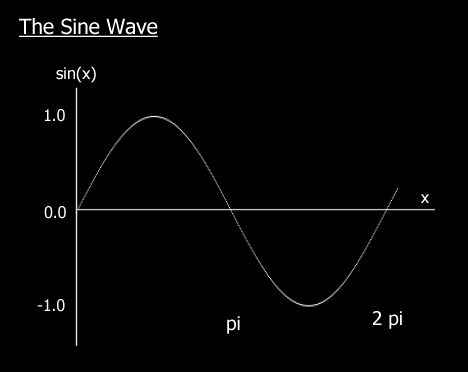 This function has a period of 2 pi, which means that every 2 pi up to infinity, it will repeat itself identically. However, you benefit from extra speed if you restrain the argument of the sin() function from 0 to 2 pi. Additionnaly the sine function always returns a value within the interval [-1,1]. Also note that sin( 0 ) = 0 and sin( pi / 2 ) = 1, and that the function grows strictly over that interval. This property is used for sine interpolation... Even though it's not used very often, I just thought I'd mention it for those of you that read last week's tutorial. The cosine wave is very similar to the sine, except that it is translated by pi/2. The sine is also the derivative of the cosine.
That's all you need to know right now. If you ever get into 3D, consider reading up more about this function... It's fascinating! I'd say it's the mother of all functions, but some people would give that name to the exponential. Either way it's a pretty close call :) |
|
Precalculation
|
|
Remember last week's stuff about precalculation, well the plasma is a case where precalculation would be extremely helpful. I'd rather not imagine calculating multiple sines per pixel in real time. The secret is to precalculate as much as possible, and how much we can precalculate very much depends on how we make the plasma evolve over time. One of the most common methods is to translate the function like so:
So instead of changing the function every frame, we just use different parameters x and y. This makes precalculation much easier: we can calculate the result of the function for an arbitrary number of pixels, usually twice as many as the screen resolution in both dimensions (x4). We store this information in a buffer, and every frame we select which portion of that buffer we want to use. Additionnaly, to make the plasma less monotonous, we can define our plasma function as a sum of two precalculated functions:
Function 1 is a sine function of the distance to the origin, and very commonly used for plasma equations:
Function 2 is a product of my imagination:
You will notice that both functions are contained within the interval [0..127]. Also, when you make up your own functions, watch out for the divide by zero error. |


|
Generating The Colours
|
|
Now we need to determine what colours to assign to each result of our plasma function. Keeping in mind that we have a 256 colour palette, we have several options available: 1) Generate any palette with smooth colour transitions, and test the result of the plasma function for overflow (make sure it's in the palette's range). But using a compare instruction per pixel would be slightly slower. 2) Create the same sort of palette, but we choose and precalculate our functions so that they always return valid values that will lie within the palette range. No compare instructions are needed. This method would work for the two functions above. 3) Generate a palette that wraps around itself, i.e. the last colour is the same as the first. The advantage is we don't need to care about how we generate our functions, and no need to clip the result either. Another important reason to use this method: if we add 4 pixels at a time to gain speed, we would not need to bother with overflow.
|

|
Final words
|
|
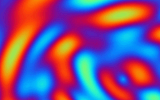
There are no limits to your imagination now: you could invent any number of functions, precalculate them, and add them together or use any other operation you can think of to generate the plasma. You could also create an image in Paint Shop Pro, and add that to your plasma function, like I did in the example. I'm not quite sure what will be in next week's tutorial, probably something about filters. I bet you can't wait :) Download this week's demo and source code package right here (70k) Enjoy, Alex |